
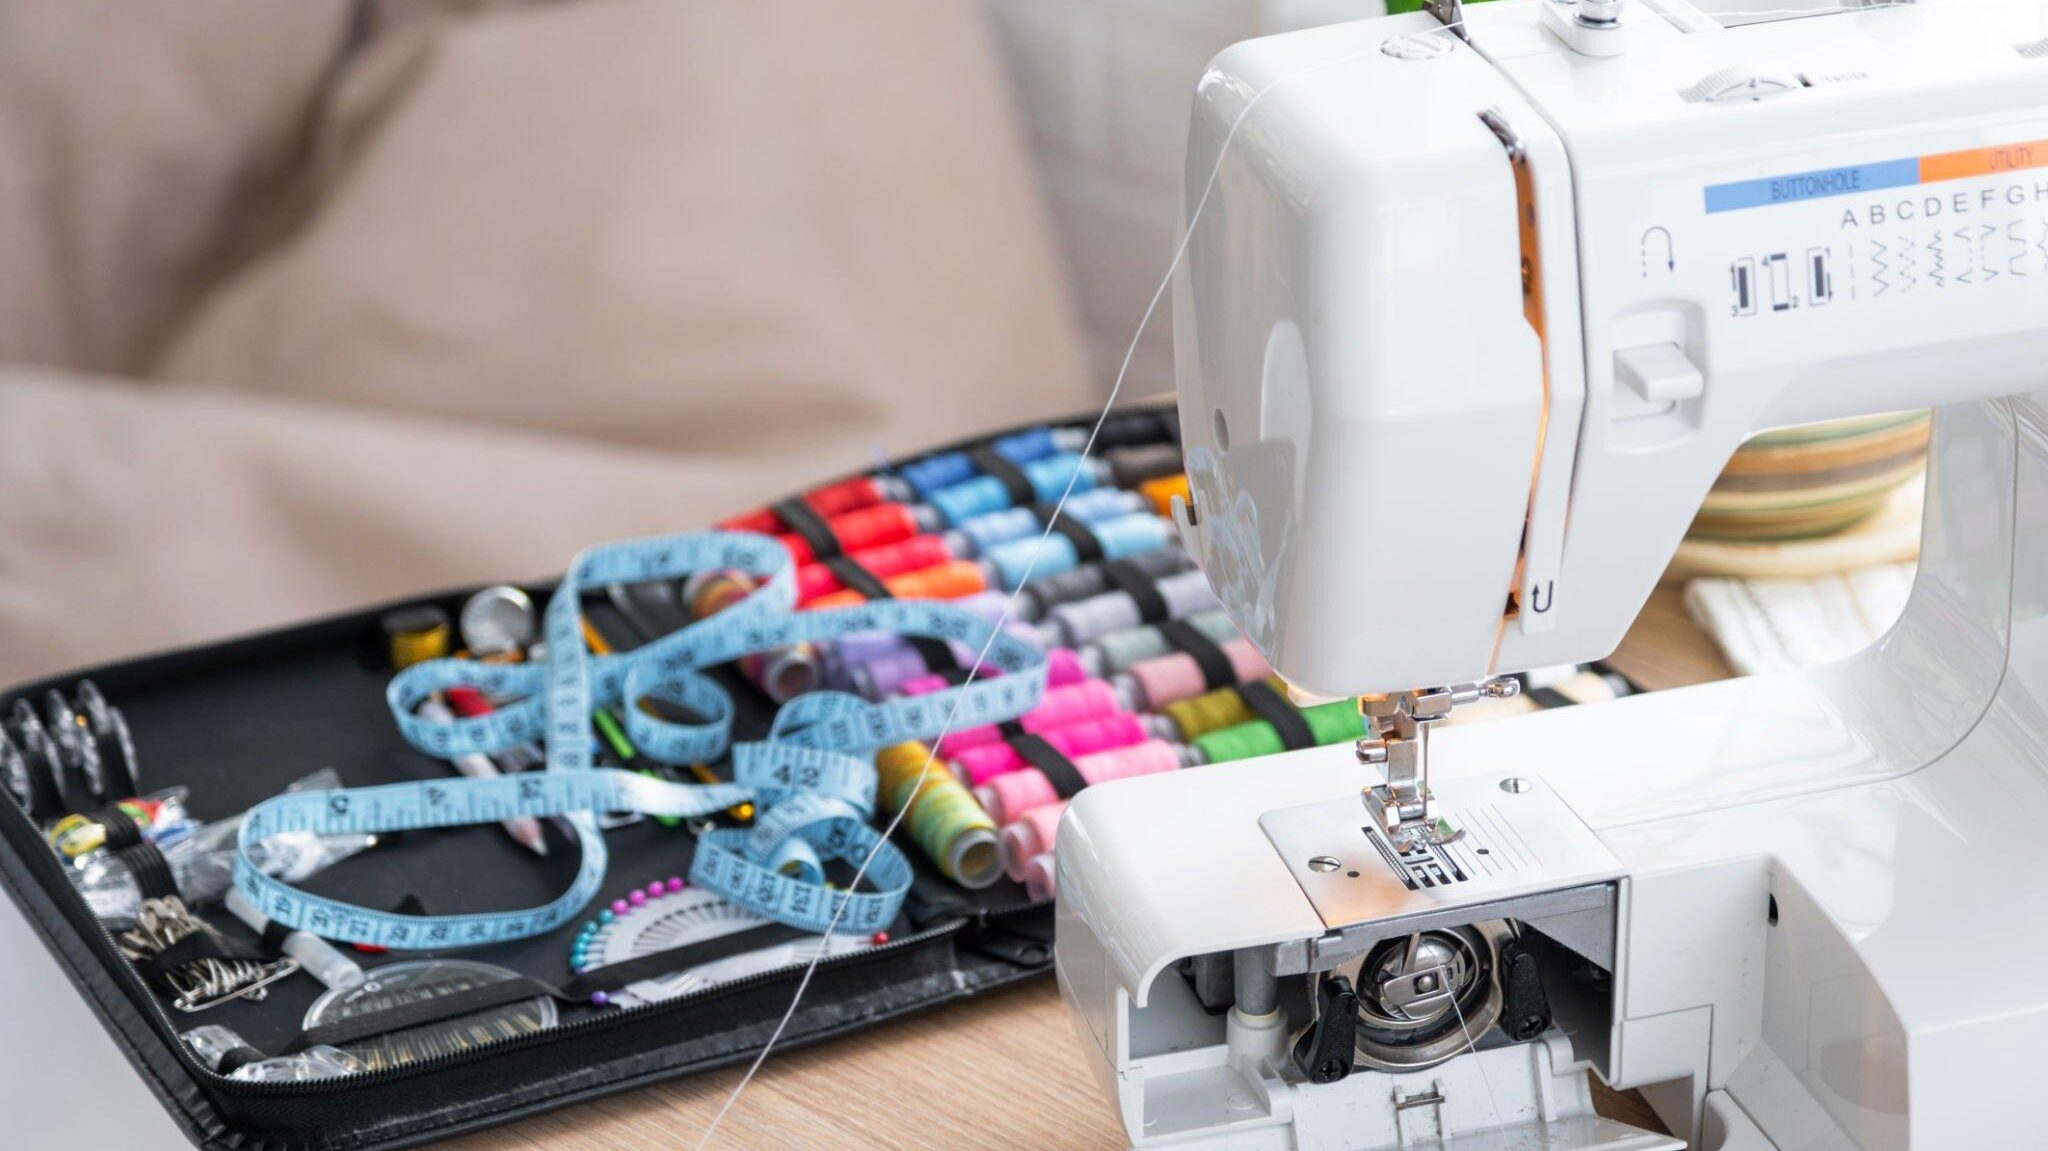
Sewing enthusiasts know the frustration of tangled threads, uneven stitches, and fabric puckering on their prized projects. While these issues may seem like a nightmare, they are not uncommon and can often be attributed to one culprit: sewing machine tension problems.
Whether you’re a seasoned seamstress or just getting started, understanding the ins and outs of tension settings is crucial for achieving flawless stitchwork. This article will explore some common sewing machine tension problems and provide practical solutions to help you confidently conquer them. So sit back, thread your needle, and unravel the mysteries of sewing machine tension together!
Various Tension Problems in a Sewing Machine
There are several tensions you can encounter on a sewing machine.
- Thread tension
- The needle bar tension
- The spool pinion control (or “speed control”) tension
- Bobbin tension
- The tension on your backstop screw
Thread tension
The most common problems sewers encounter when using a sewing machine are thread tension issues. Whether you’re a beginner or an experienced seamstress, dealing with thread tension can be frustrating and time-consuming. Poorly balanced thread tension can result in uneven stitches, loops on the fabric surface, and even broken threads.
Several factors can contribute to thread tension problems. First, improper machine threading can lead to imbalanced tensions in the upper and lower threads. Additionally, using the wrong type or weight of thread for your project can also cause tension issues. Finally, worn-out or improperly adjusted bobbin cases or tension disks could be to blame.
To address these issues and achieve perfect thread tension, it is essential to start by correctly threading your sewing machine according to the manufacturer’s instructions. You should also use the appropriate thread for your fabric and project type. Continue to experience tension problems despite these efforts. Following tutorials from reliable sewing resources, it may be necessary to have your machine professionally serviced or adjust its bobbin case or tension disks yourself.
Understanding the potential causes of incorrect thread tension will help you save time and easily produce more professional-looking garments and projects. So don’t let those pesky thread tension problems get in your way – take charge of your sewing machine’s settings today!
The needle bar tension is set too tight or loose
Regarding sewing, the needle bar tension is crucial for perfect stitches. If the needle bar tension is set too tight or loose, it can cause problems in your sewing machine. One common issue from incorrect needle bar tension is thread breakage and shredding. When the tension is too tight, the thread gets pulled tightly and can’t flow through the fabric smoothly, resulting in fraying and eventual breakage.
On the other hand, if the needle bar tension is set too loose, you may notice loops forming on the underside of your fabric. This happens because there isn’t enough pressure to properly hold both upper and lower threads together. The result? Uneven stitches that don’t hold up well in finished projects.
Finding a balanced needle bar tension that allows for smooth thread flow without excessive loosening or tightening is crucial to achieving optimal sewing results. Remember to adjust this setting depending on the fabrics you sew with – heavier fabrics may require slightly looser tensions, while lighter ones need tighter ones for secure stitching.
Mastering needle bar tension will improve your sewing experience and produce high-quality results. Don’t overlook this vital component of your machine setup, as it can be key to troubleshooting any issues you might encounter while stitching various kinds of fabric. Take some time to experiment with different settings until you find what works best for you and your projects!
The spool pinion control (or “speed control”) tension is set too tight or loose
Finding the perfect balance is crucial for optimal performance regarding the spool pinion control tension on a sewing machine. If the tension is too tight, the machine may struggle to feed the fabric smoothly as it pulls and stretches. This can result in uneven stitches and even cause the thread to break or snap. On the other hand, if the tension is too loose, the fabric may not be properly held, causing it to slip or bunch up while sewing.
Adjusting the spool pinion control tension requires careful attention to detail, but once dialed in correctly, it can make a significant difference in your sewing experience. Try experimenting with different thread types and fabrics to determine if your tension is too tight or loose. Also, pay close attention to any unusual sounds from your machine while sewing, as this could indicate that something isn’t quite right with your tension settings.
Finding the perfect spool pinion control tension often involves striking a delicate balance between keeping the fabric securely in place and allowing smooth movement of both fabric layers during stitching. It’s important not to overlook this aspect of sewing, as even minor adjustments can greatly impact your machine’s stitch quality and overall performance. So take some time to test and fine-tune your tension settings – you’ll be pleasantly surprised with how much smoother and more enjoyable your sewing projects become!
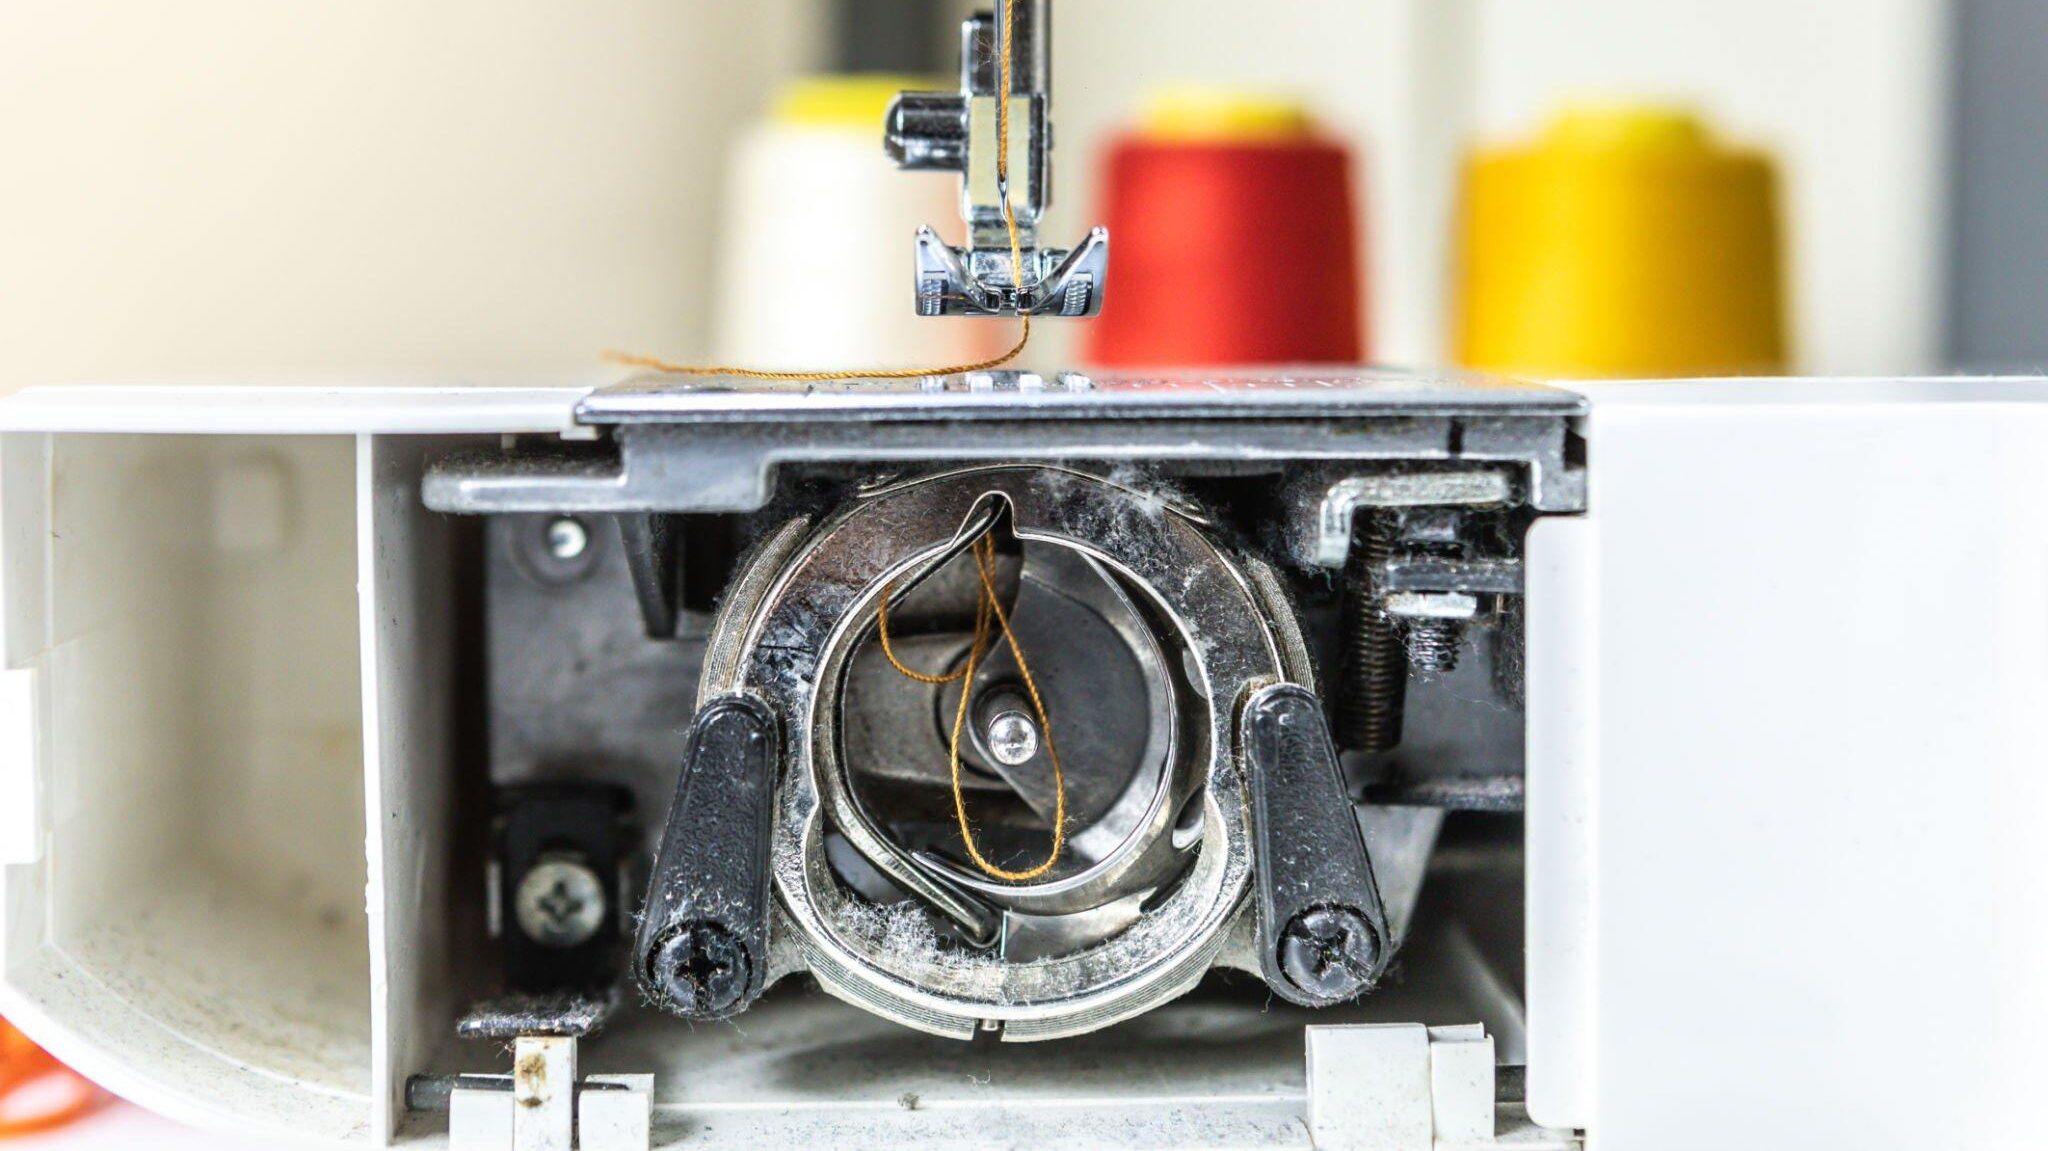
Bobbin tension
If you’re facing difficulties with your sewing and seeing stitches that aren’t up to par, the first thing to examine is the tension on your bobbin. This is a crucial aspect of sewing that greatly impacts your work’s quality. Let’s delve into the world of tension adjustment, and don’t worry; it’s not as complex as it may sound.
The tension of threads is how tight or loose the threads are when they form a stitch. When the tension is off, it can lead to sewing woes, like uneven stitches and fabric puckering. To fix this, you can tweak the tension settings on your sewing machine.
The good news is that adjusting tension is a straightforward process that doesn’t require lifting the presser foot or fiddling with the bobbin tension. Your sewing machine has built-in mechanisms for making these adjustments, and it’s a handy skill.
If you ever need to reset or fine-tune your machine’s tension, start by turning off the machine and lowering the pressure. This will make the process much smoother. Plus, when washing and drying your fabrics, especially if you want a gentler clean, lowering the pressure is also advisable.
With time, the tension on a sewing machine can become a bit slack. Consider using a sewing tape measure to accurately read your bobbin tensions. In any case, it’s vital to proceed with caution. Making hasty adjustments can result in uneven stitches and unsightly wrinkles in your finished seams, which is not what you want.
Here’s an example to illustrate: If you decide to change your bobbin tension and end up with uneven stitches where the bottom thread is tighter than the top thread, take a moment to inspect your top tension. This setting controls how firmly or loosely the machine presses down on the fabric. The fabric should be tensioned equally on both sides for consistently even stitching. If they aren’t, a minor adjustment is in order.
Now, remember that the tension on the underside of the fabric is just as crucial as the top tension, maybe even more so. You aim to achieve a uniform stitch across both layers, so maintaining equal tension is key.
Top tensions dictate how hard or loose the machine presses down while sewing, while bottom tensions determine how tight or lose the stitches are once they’re sewn. Typically, top tensions are tighter than bottom tensions, but there are exceptions.
Most sewing machines come with clear instructions for adjusting these settings. Often, there’s a diagram that illustrates the steps to take. These settings should be reset after sewing different fabrics of varying weights or changing your thread. Thankfully, adjusting them doesn’t take much time, but it’s crucial to understand how they function to ensure proper adjustments.
Don’t let frustration get the better of you when encountering issues like bad stitching or fabric puckering. Instead, keep calm and check your tension settings. Proper tension adjustment can make a difference in your sewing projects, ensuring they turn out beautifully every time.
The tension on your backstop screw is too tight or loose
The tension on your backstop screw plays a crucial role in the performance of your equipment. If it is too tight, the space between the feed dogs and the presser foot will be too small. This can lead to fabric getting caught or uneven feeding, resulting in poor stitch quality. On the other hand, if the tension is too loose, there will be excessive space between the feed dogs and the presser foot, causing fabric to slip or bunch up.
Finding the perfect balance for your backstop screw tension requires trial and error. Start by loosening or tightening the screw incrementally until you achieve an optimal stitch formation and smooth fabric feeding. Additionally, consider adjusting this tension based on different fabrics or sewing techniques. For example, delicate fabrics may require a looser tension to prevent snagging, while heavier materials might require a tighter setting to ensure proper control.
Maintaining proper backstop screw tension is essential for achieving professional results and prolonging your machine’s lifespan. A balanced tension allows for smoother operation with less strain on both needle and thread. Over time, inconsistencies in tension can lead to unnecessary wear and tear on these components, leading to costly repairs or premature replacement.
Understanding and managing the tension on your backstop screw is fundamental to achieving precise stitches and optimal fabric feeding. By fine-tuning this element according to different materials and techniques used in your projects, you can take full control of your sewing experience and produce high-quality results every time!
Sewing Machine Tension Issues
If you face any tension problems in your sewing machine, it might cause these issues.
- Fabric stretching
- Poor stitch quality
- Uneven stitches or skipped stitches
- Fabric puckers/stretching
- Difficulty with zipper construction
Fabric stretching
Fabric stretching is a common issue many sewers face, especially when working with heavier-weight fabrics. One of the main culprits behind fabric stretching is tension problems. It measures how tight the stitches are and can be adjusted on most sewing machines. The tension should not be too loose as this could stretch the fabric while you sew, resulting in distorted seams and an ill-fitting final product.
Before working on your project, you should test your tension settings on a scrap piece of fabric. Sew a few stitches and check if they appear neat and balanced. If one thread is more prominent than the other or you notice loops forming on either side of the fabric, adjust your tension accordingly until you achieve even stitches.
Another factor contributing to fabric stretching is handling and feeding your fabric through the machine. Pulling or pushing too forcefully can cause unnecessary strain on delicate fabrics, leading them to stretch during the stitching process. To combat this issue, support and guide your fabric gently as it moves under the presser foot, allowing for smooth feeding without exerting excessive force.
By paying attention to these tips and being mindful of tension problems when working with heavier-weight fabrics, you’ll easily avoid unwanted stretching issues and create beautiful garments. Remember that practice makes perfect – don’t be discouraged if it takes a few attempts to find the right balance; soon enough, you’ll master this essential sewing skill!
Poor stitch quality

A sewing machine with thread tension that isn’t just right, you could encounter several issues:
Thread breakage: If the tension is too tight or loose, the thread might break while sewing.
Puckered fabric: Incorrect tension can make the fabric puckered and not flat.
Loose stitches: When the top thread tension is loose, it can result in stitches that are not secure.
Poor sewing results: The outcome of your sewing project could be compromised with uneven seams and fabric that puckers.
To address these problems, many sewing machines offer a fabric pressure adjustment feature. This function helps ensure that your fabric feeds smoothly and attaches properly. Neglecting to use this feature can lead to uneven stitches and subpar stitching quality.
Uneven Stitches or Skipped Stitches
Uneven tension and skipped stitches can cause major problems on your sewing project. They mess up the fabric and make sewing a frustrating task.
To ensure your tension is spot-on, do a quick check on the underside of your fabric. If you spot loops and loose threads down there, it’s a sign your tension is too high. High tension can cause problems like misalignment, skipped stitches, or snapped threads.
Watch out for skipped stitches or thread breakage if you’re working with heavy-duty thread and adjusting the bobbin tension. This can happen when the needle wheel moves too much and the top tension is too tight, putting excessive pressure on the fabric.
So, keep an eye on your tension, and your sewing projects will turn out much smoother. Beware.
Uneven Stitches
The most frustrating aspect of sewing is discovering uneven stitches in your project. It can be disheartening to spend hours carefully stitching only to find that the result is less than perfect. Uneven stitches can occur for various reasons, but one common culprit is misalignment and different thicknesses in the fabrics being sewn together.
When sewing with fabrics of varying thicknesses, it’s important to align them correctly before sewing. If one fabric is significantly thicker than the other, you may need to adjust your machine’s tension or use a walking foot to ensure even stitches. Additionally, using a fabric stabilizer or interfacing can help prevent uneven stitching by providing a more consistent surface for sewing.
Another factor contributing to uneven stitches is rushing through the sewing process. Sewing requires patience and attention to detail, and taking shortcuts can lead to poor stitch quality. When aligning fabrics and threading your machine, ensure everything is properly positioned before stitching. It may seem tedious initially, but the result will be well worth it.
The frustration of discovering uneven stitches in your sewing project can be disheartening, but there are steps you can take to prevent this problem.
Thread Looping on the Top
When it comes to thread looping on the top, there are a few common culprits that you should be aware of. Among the causes is improper bobbin tension. If your bobbin tension is too loose or tight, it can result in excessive thread looping on the top of your fabric. It is also possible to experience this issue when there is too much pressure on the top tension. When excess pressure is applied to the top thread, it can create loops and snags in your stitching.
It’s crucial to properly adjust both the bobbin and top tension to ensure smooth and loop-free stitches. Start by checking your bobbin tension first – make sure it is neither too loose nor too tight. You may need to experiment with different settings until you find the right balance for your specific machine and thread type. Additionally, check the top tension on your sewing machine and adjust as necessary. The ideal setting will vary depending on fabric thickness and stitch type.
Remember that proper maintenance techniques, such as regularly cleaning out any lint or debris from your sewing machine, can also help prevent thread looping on the top. By taking these steps and paying attention to both bobbin and top tensions, you’ll be on your way to flawless stitching every time!
Fabric puckers/stretching
To prevent fabric stretching while sewing:
- Adjust top tension or increase bobbin tension. Not doing so leads to low-quality stitching and thread tearing.
- Excessive top tension causes fabric bunching due to downward force.
- Balance top and bobbin thread tensions for successful sewing.
- Incorrect adjustments can break the bobbin or thread.
Difficulty with zipper construction
Zipper construction and troubleshooting can be tricky, and the main reason is often the tension of your sewing machine not being set right for the fabric you’re using. When dealing with a fancy zipper, it’s important to adjust the top tension to ensure it functions as it should. Simply sewing it on without proper adjustments won’t cut it. The top and bobbin tensions need to be tweaked for the best results.
When using a ruler and seam guide, ensure you use them with the right pattern pieces. These tools are designed to help you make accurate measurements and guide you in your sewing projects.
- If the ruler and seam guide aren’t lined up right, it can mess up your sewing.
- Make the top tension match the seam guide with a precise sewing machine.
- If you also want to fix the bobbin tension, check if the bobbin case is okay.
- You can use a square ruler or a pin bent to match your machine’s seam guide.
Random loops
Random loops can be a frustrating issue when it comes to sewing. It’s often a sign that something isn’t quite right with your thread tension. If you’re finding that you’re getting a lot of bulk under the thread, changing your thread tension to a lighter setting than recommended for your specific project might be worth changing.
Random loops occur because the tension on the top and bottom threads is unbalanced. When the tension on either side exceeds or falls below the specified value, the thread pulls and creates unwanted loops. Adjusting your thread tension to a lighter setting allows more give in the stitches and helps prevent those annoying loops from forming.
Another possible reason for random loops is that the machine may not be properly threaded. Even if you think you’ve got all the threads in the correct position, one small mistake could be causing big issues. Carefully rethread your machine, ensuring each step is followed correctly. This simple act may just solve your loop problem and have you back to smooth sewing in no time.
Dealing with random loops while sewing can be frustrating, but don’t worry! You can overcome this issue effortlessly by adjusting your thread tension or double-checking your machine threading. With just a little patience and attention to detail, you’ll soon find yourself creating beautifully stitched projects without any sign of those pesky loops breaking up your work. Happy sewing!
How to Adjust the Tension on A Sewing Machine?
If your sewing is causing issues like loose threads or skipped stitches, don’t worry; you can make some simple adjustments to improve your stitching.
Firstly, if you’re experiencing excessive bulk under the thread, consider changing your thread tension to a lighter setting than what’s typically recommended for your fabric. Usually, you’d use thicker top and bottom threads when sewing with knits. As a result, sometimes, the weight of these threads can pull down on your fabric and create loops around the stitches.
Now, let’s talk about tension. The top thread won’t pull enough to create a good stitch if your thread tension is too loose. Conversely, if it’s too tight, it can cause the bobbin thread to break or result in skipped stitches.
Another factor to check is your needle. If it’s not set correctly or has become dull over time, it can lead to skipped stitches, especially when sewing through thicker materials like canvas, denim, or wool. You might consider switching to a ballpoint needle for denser fabrics in such cases.
To fine-tune your tension, turn the handwheel until the thread is at its highest tension setting and check your stitches. If they’re still too loose, try turning it back one notch. Additionally, loose stitches might be due to a loose bobbin casing, so ensure it’s properly secured.
If your bobbin thread is breaking or causing skipped stitches, it could be due to uneven bottom tension. You can adjust the top and bobbin tension settings to be tighter but remember not to change one significantly more. Experiment with these settings until you find what works best for your sewing machine.
When dealing with stitching issues, consider adjusting your thread tension, ensuring your needle is in good condition, and checking the bobbin casing’s tightness. These simple tweaks should help you achieve better and more consistent stitching results with your sewing machine.
Automatic Tension in a Sewing Machine
Automatic tension in a sewing machine is an important feature that ensures even and balanced stitches. To find the automatic tension setting, you can follow a simple process. First, press the needle down and then move it up and down in several different directions. This will help you determine if the stitches are even and if there is any gathering. If you notice uneven stitches, it indicates that the tension needs to be adjusted.
To set the tension correctly, refer to your sewing machine’s manual for specific instructions, which may vary depending on the model. Generally, a dial or knob will allow you to adjust the tension. Start by setting it to the recommended default setting and then make small adjustments as needed. Repeat the needle test after each adjustment until you achieve even stitches without gathering.
Remember that finding the right tension setting may require some trial and error. Still, with practice, you will become more familiar with your sewing machine’s automatic tension feature and be able to achieve professional-looking stitches consistently.
FAQ about sewing machine tension problems
What is sewing machine tension?
Sewing machine tension refers to the pressure or tightness applied to the thread as it passes through the machine. It is an essential aspect of sewing as it determines how well the stitches are formed and how balanced they appear on both sides of the fabric. Proper tension ensures the stitches are secure, evenly spaced, and do not pucker or gather.
It is possible to adjust the tension on a sewing machine using a tension dial or knob located on the machine. Most machines have two tension mechanisms – one for upper threads and one for lower bobbin thread. Adjusting these tensions allows you to achieve the desired stitch quality based on fabric type, thread thickness, and stitch pattern. Finding the right balance between these tensions is important to prevent issues such as loose stitches, thread breakage, or uneven stitching.
Sewing machine tension is a crucial element in achieving high-quality stitching results. Understanding how to adjust and maintain proper tension will greatly contribute to successful sewing projects and ensure your stitches look professional and secure.
How do I know if my sewing machine tension is off?
A few signs can indicate if your sewing machine tension is off. One common sign is when you see uneven or loose stitches on your fabric. If the top thread is too loose, it will create loops on the bottom side of the fabric and vice versa. Additionally, if you notice that the thread keeps breaking frequently while sewing, it could indicate incorrect tension.
Another way to determine if your sewing machine tension is off is by examining the appearance of the stitches. If the stitches appear puckered or too tight, it may mean that the tension needs adjustment. On the other hand, if the stitches appear wavy or loopy, it could also be a sign of incorrect tension.
To fix this issue, reread the top and bobbin threads and ensure they are properly inserted into their respective tension discs or guides. You can adjust the tension dial gradually in small increments until you achieve balanced and even stitches. Experimenting with scrap fabric before working on your project to ensure optimal results is important.
Should I always adjust my sewing machine’s tension for every project?
Adjusting your sewing machine’s tension for every project is generally recommended. The tension settings on your machine determine how tight or loose the stitches will be, and different fabrics and thread types may require different tension levels. Adjusting the tension ensures that your stitches are even and balanced, preventing issues such as puckering or skipped stitches.
It is important to note that not all projects may require a significant adjustment in tension. If you work with similar fabrics and threads, you may find that the same tension setting works well for multiple projects. Some modern sewing machines also have automatic tension settings that adjust automatically based on the fabric type. Ultimately, it is best to experiment and test your stitches before starting a project to determine if any adjustments need to be made.
How do I clean my sewing machine tension discs?
To clean your sewing machine tension discs, you can follow these steps:
1. Turn off and unplug your sewing machine to ensure safety.
2. Remove any visible dust or lint from the tension discs using a small brush or a soft toothbrush. Be careful not to apply too much pressure or force, which may damage the discs.
3. If stubborn debris is stuck in the tension discs, you can use a piece of thread to floss between them. Simply insert the thread into the discs and move it back and forth to loosen and remove any buildup.
4. Once you have removed all visible debris, it is possible to use compressed air to remove any remaining particles from the tension discs.
5. Connect your sewing machine and run a few test stitches to ensure the tension works properly.
Regularly cleaning your sewing machine’s tension discs will help maintain its performance and prevent any issues with stitch quality or tension adjustments.
What is the best tension for a sewing machine?
The best tension for a sewing machine should be determined by the type of fabric used and the project’s desired outcome. Then again, as a general guideline, it is recommended to start with a medium tension setting (around 4 or 5) and make adjustments from there.
If the stitches appear too loose or uneven, you may need to increase the tension slightly. On the other hand, if the stitches are too tight or causing puckering in the fabric, you may need to decrease the tension. Testing different tensions on scrap fabrics before starting your project to get the best results is important.
Finding the best tension for your sewing machine may require trial and error. It’s always a good idea to consult your sewing machine’s manual for specific instructions and recommendations for different fabrics and techniques.
Conclusion
In conclusion, understanding and properly adjusting your sewing machine’s tension is crucial for achieving high-quality stitches and preventing unnecessary frustrations. The tension controls the balance between the top and bobbin threads, ensuring they work together seamlessly. If the tension is not set correctly, you may encounter issues like loose stitches, puckering fabric, or thread breakage.
Fortunately, most modern sewing machines have easy-to-use tension dials that allow you to make precise adjustments. Take the time to experiment with different settings and practice on scrap fabric until you find the perfect balance for your specific project. By mastering this essential skill, you will unlock the full potential of your sewing machine and elevate your sewing projects to new heights of excellence.
Does An Embroidery Machine Also Sew?
Sewing Machine Needle Problems (20+ Common Issues)
10+ Common Sewing Machine Shuttle Problems